
Paint the fairings or apply decals?
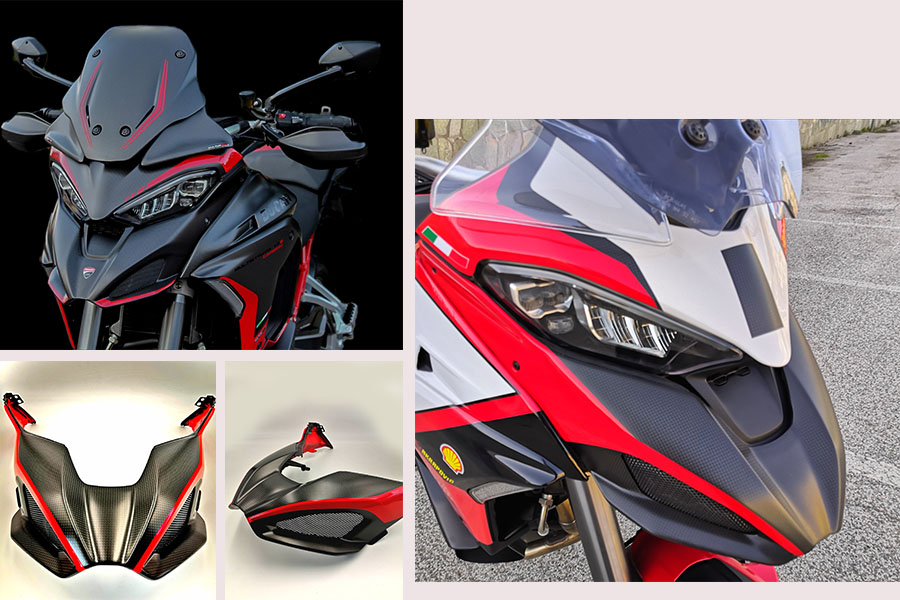
Paint the fairings or apply decals? Motorcyclists are divided into two broad categories: those who choose a motorcycle – among other things – for its aesthetic appearance and those who want to customize the bike with its "artistic touch". This second group of motorcycle enthusiasts is very vast and, not surprisingly, to satisfy it there are more types of customization of your bike. The two most important are painting and the application of adhesive graphics. Let's get to know both methods better, revealing their advantages and disadvantages.
Painting
When we think about painting, we often make a mistake of superficiality that can ultimately cause damage to our bike. In fact, most people believe that it is enough to go to the supermarket and buy a can of the desired color and, once back home, it is sufficient to spray on the hull.
Nothing could be more wrong: there are different types of paint and other additional components to pass during preparation and at the end of painting. Starting from the paint, on the market we find various types of various brands, those that we are going to choose for the coloring of the fairings, however, restrict the field of research.
The hulls, in fact, are made of plastic or fiberglass and therefore it is obvious that paints for metals and masonry will be excluded. Basically, paints for hulls can be divided into two large groups:
- one-component (nitro paints)
- two-component (acrylic and polyurethane paints)
Nitro paint is defined as a single-component, as it hardens thanks to the evaporation of the solvents contained in it. It can be had both with glossy finish and with matte finish. Acrylic or polyurethane paints, on the other hand, are defined as two-component as they are composed (as the name implies) of two components: the paint and the catalyst; The latter has the task of hardening the paint.
Nitro paints, however, have been banned since the beginning of 2008 in favor of two-component paints, which is therefore the one to be analyzed more carefully. There are many effects that can be achieved with a paint: starting from the pastel color, then moving on to metallic, pearl and iridescent.
Acrylic paints have a greater brilliance, but unfortunately have the disadvantage of being quite delicate, these are contrasted with polyurethanes, which are slightly less bright, but decidedly more robust.
To obtain a pearly or iridescent effect, moreover, it is necessary to adopt a two-component double-layer paint. This varnish consists of a non-catalyzed base color (usually pastel color), on which a two-component gloss (transparent plus catalyst) must be applied. In the transparent there are colored particles that, overlapping with the background color, will create the final effect.
There is one last step necessary to choose the paint that best suits us: we must choose the method of application. To paint a hull we can in fact adopt 2 solutions:
• per can
• with compressor
All bodybuilders usually use a painting made with compressor and gun, this type of painting is therefore recommended to have a job done to perfection, but only if you are familiar with the right tools. Lately, in the best supplied paint factories, it is also possible to have spray cans made with the desired color, this type of painting can obtain (if well done) a good result.
In addition to choosing the paint, you need many other precautions to do a good job. First of all, it is necessary to dismantle the hull to have more freedom of movement in the work. In addition, you need the following tools in addition to paint to complete the procedure:
- glass paper of different grain sizes
- anti-silicone
- primer (also called primer or clinging)
A job that requires time, patience and precision and that, with these components, can give a high quality result.
Application of adhesive graphics
Not everyone has the accuracy and patience to color their own hulls, thus turning to specialized people with an inevitable increase in costs. The application of adhesive graphics is therefore an alternative method to customize your fairings.
First, you need the following material:
- colored adhesive roll (available in graphic studios or directly from the manufacturer)
- cutter
- needle
- dry rag
- wallets (or specific spatula) I recommend the first mentioned
In addition, also in this case the hull must be dismantled for the same reasons. It is essential that the surface is perfectly clean and dry; A little dust or dirt may not cause the adhesive sheet to stick properly.
Cut out a piece of adhesive (the thickness of the paper must not in any way exceed 120 microns), usually rectangular, which has a surface greater than that of the hull you want to cover (unfortunately a lot of adhesive will be in excess). Once this is done, remove a corner of the paper below the sticker and apply it on your hull. After arming yourself with a hair dryer or heat gun, you can start heating the sheet to "deform" it to your liking. You will help in the application with a wallet, to better apply the adhesive even in difficult places. With the operation of heating I add, it will be much easier to spread everything even on curved and "rounded" surfaces.
It will happen several times to raise the adhesive already glued and to re-extend it, this only in the case of the presence of bubbles or crumples. The bubbles can also be eliminated by piercing them with a needle and then spread with a finger (you can always heat that point with the hairdryer). Totally covered the hull with the wallet method, you will cut the excess edges and we will try to advance a little so that you can glue it behind the hull, so that the surface in sight is better hooked (the paper must always be in tension even at the edges).
You will then have your hull covered in adhesive ready, you can safely wash it with water using a wet rag. A method that, of course, has advantages and disadvantages such as painting. It's up to you to choose the one you think is best.
- Advantages: low cost of the material, possibility to return to the previous color very easily, simplicity in washing and high durability over time.
- Defects: difficult application (at the second time everything is simpler), risk of creating bubbles (easy to fix), inability to create shades.
Share this content